Last year when I moved into my new apartment, I upgraded to a Ubiquiti UniFi Dream Machine (UDM) router to support the gigabit Internet speed I could now subscribe to. Due to the location of the fiber optical network terminal (ONT) in my home, the UDM had to be located in the closet of my secondary bedroom, which is on one side of the apartment. Now while the UDM has a powerful enough Wi-Fi signal that can cover my apartment reasonably, the 5GHz band, is significantly weaker two walls over in my main bedroom. In addition, over the summer I realized that the Wi-Fi was also pretty spotty on my balcony due to also having to cross two walls plus glass.
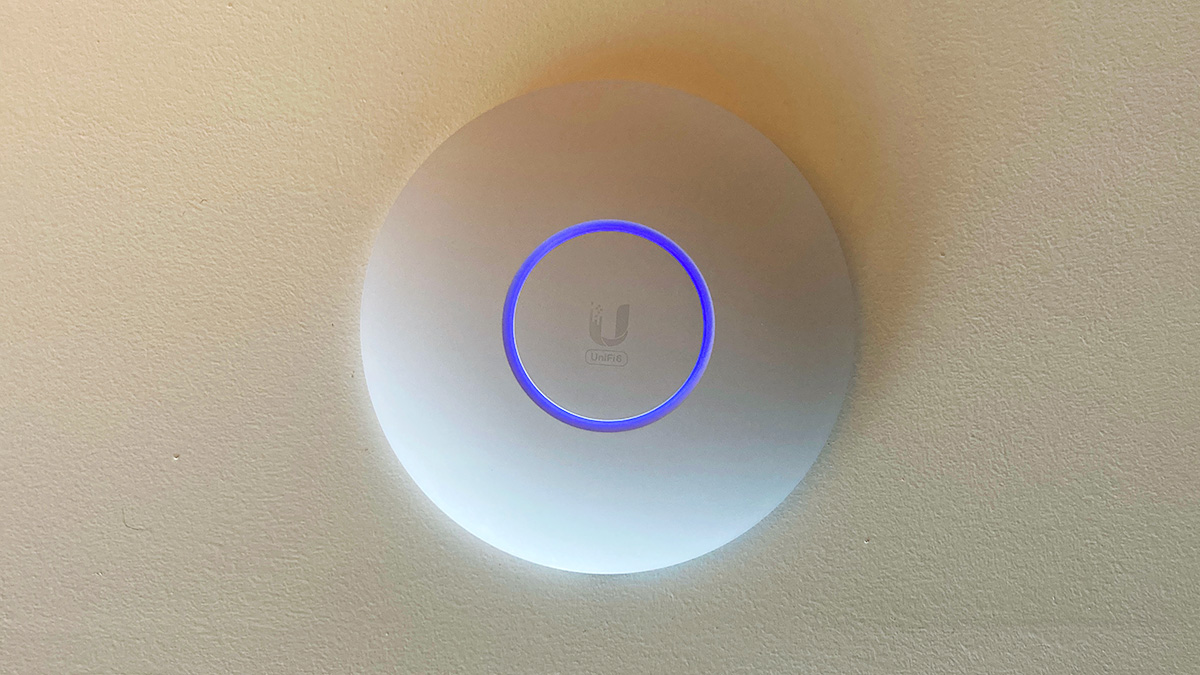
So I decided to go on a quest to improve the Wi-Fi signal. The main lineup of UniFi’s access points (AP) consist of the circular-shaped ceiling-mounted access points. I decided to go for the Unifi6 Pro. Probably very overkill.
Although they can be mounted to the wall, the radiation pattern means that the area behind the wall is a dead zone. This would not work for me because I didn’t have a free wall that would face my entire apartment. Soon, I found the best place to ceiling mount an AP would be to mount it on the kitchen bulkhead. The rest of my ceiling is concrete so it would not have been easy to mount and run the Ethernet cable cleanly. With the bulkhead I could mount the AP to it and run the cable through it to the closet, which is conveniently adjacent to the kitchen. My kitchen is also pretty central to the apartment, so an AP located there would be able to cover most of the apartment by line of sight, or through one wall at most.
Just to make sure it was feasible, I popped out some of the recessed ceiling lights in order to take a look at what was inside the bulkhead. This was to check that the space I wanted to mount it was clear, and that the bulkhead did indeed run into the closet without any additional barriers.
Tools and items used:
- Stud sensor – To find a good space to cut
- Jab/drywall saw – To make the hole for the mounting bracket
- Fish tape and/or Fibreglass rods – This will depend on your run. I ended up using both, using the fish tape to run the line, while using the rods to “push” or “help” the fish tape over/under some obstacles.
- Low voltage bracket – single gang size. The UniFi AP’s mounting brackets will fit a single gang bracket with no additional holes needed. Also when you move out it will be simple to cover this with a blank plate or one with a keystone jack. You might need another one depending on where the other end of your Ethernet cable ends up.
- Ethernet cable – your preference, depending on length and speed and how future-proof you want the cable to be. I just used typical Cat5e.
- String – for helping pull cables
- Punch down tool – Because my cable will be run to a network patch panel, this will be used to terminate the cable to the panel. But if you aren’t terminating at a patch panel, then ignore this.
Making the hole
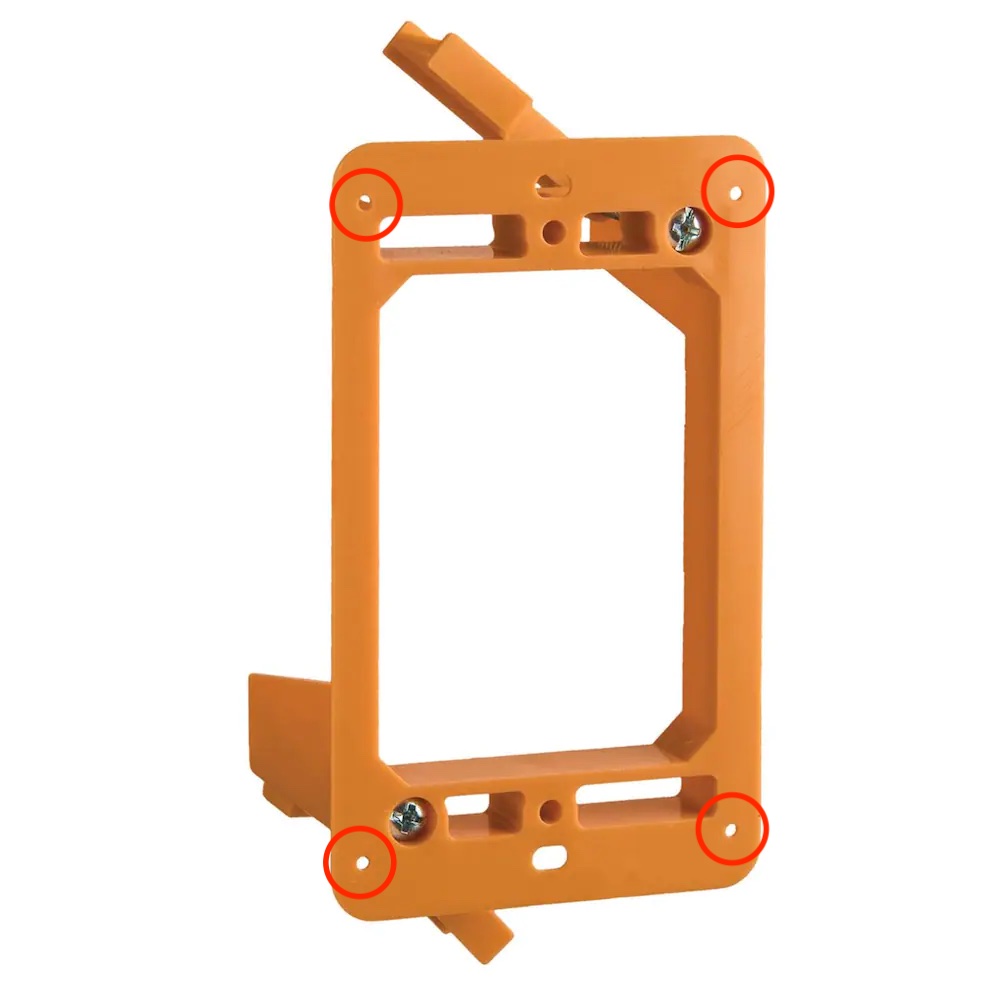
After finding a suitable area (using a stud sensor and verifying by looking through any existing openings like recessed lights), mark the opening to be cut using the 4 circular dots at the corners of the low voltage bracket. Use the jab/drywall saw to cut the hole out.
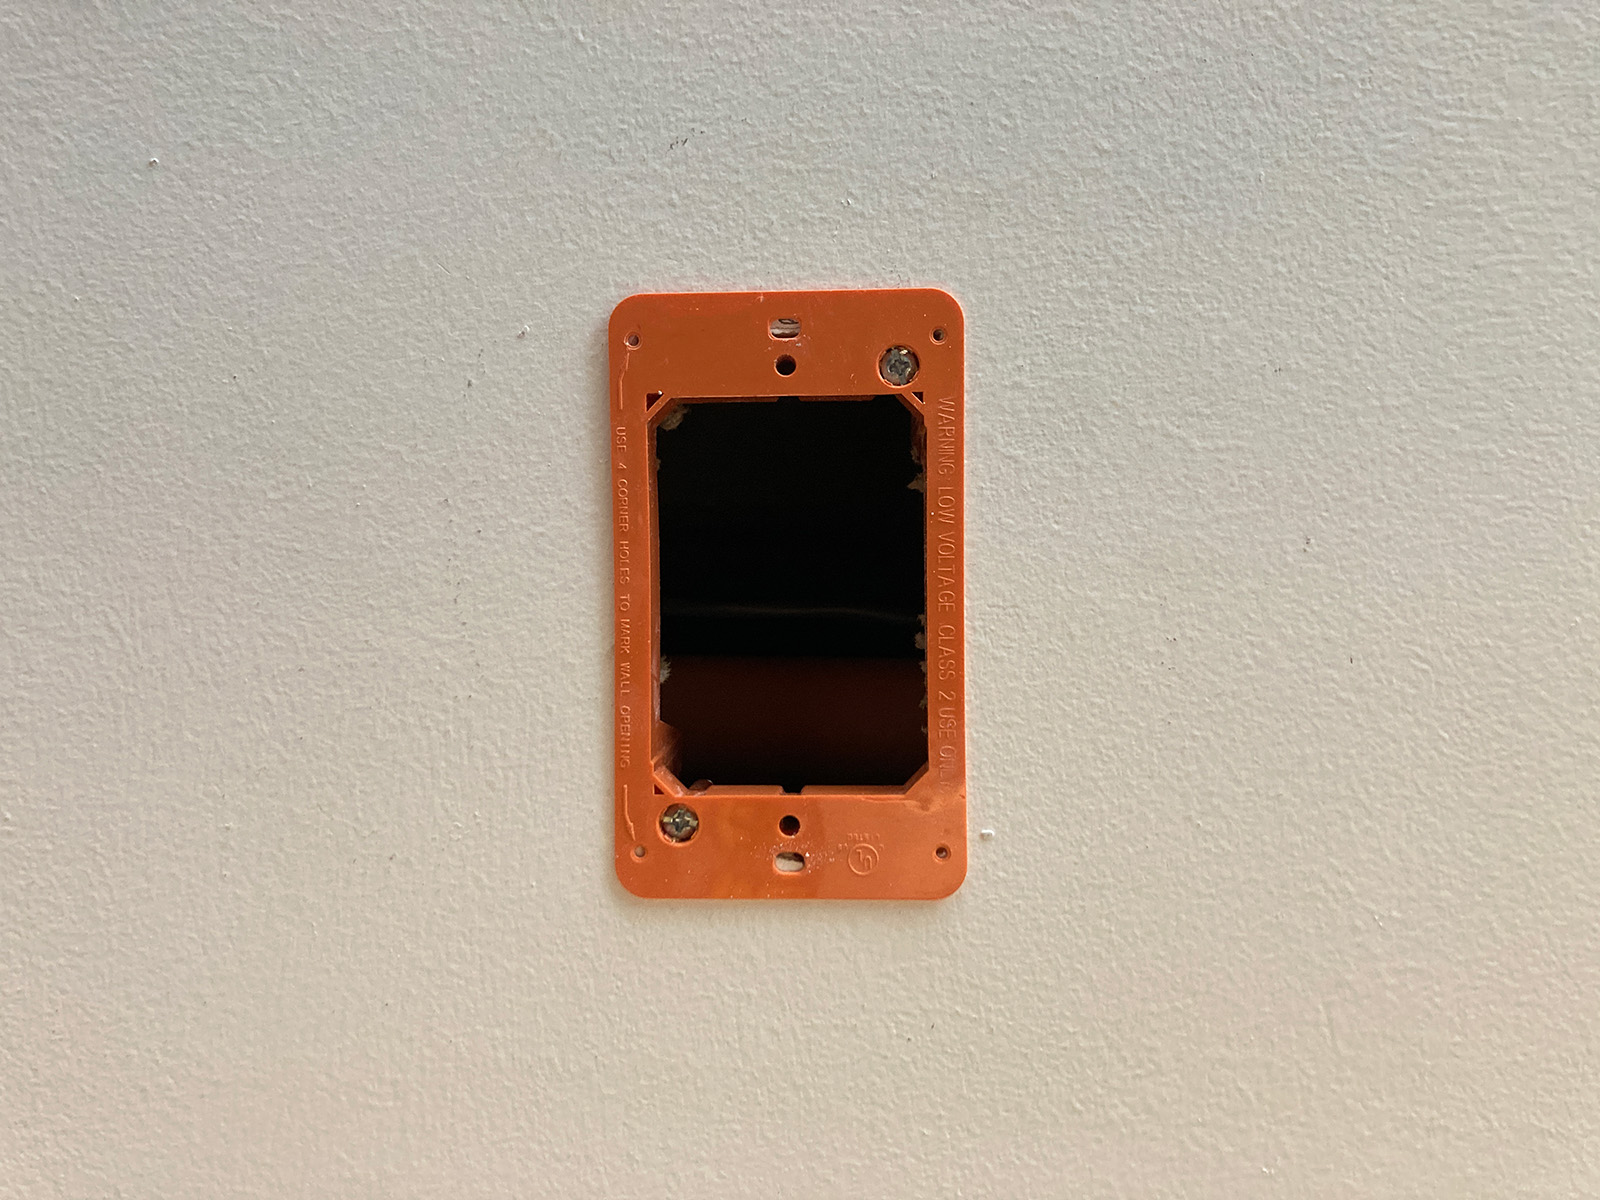
Once the piece of drywall is out, put the low voltage bracket into the hole, and use the screws at two of the corners to lock the bracket into place.
Here’s what it looks like in the ceiling:
Running the Ethernet cable
Now that there’s a hole in the ceiling, the Ethernet cable can be fished through. This will definitely depend on your specific wall, but I was able to use the fish tape most of the way, with the fibreglass rods helping push it over certain obstacles.
Since it was my first time doing this, I found it easier to pull the fish tape short distances, like from the bracket to one of the recessed lights, then to the next recessed light, pulled the string through, then repeated for the next section. Repeated this until I was able to get the two ends pulled through. Then I just tied the Ethernet cable to one end of the string, wrapping it with tape so that it doesn’t get caught on anything, then pulled it through from one end to the other.
Mounting the AP
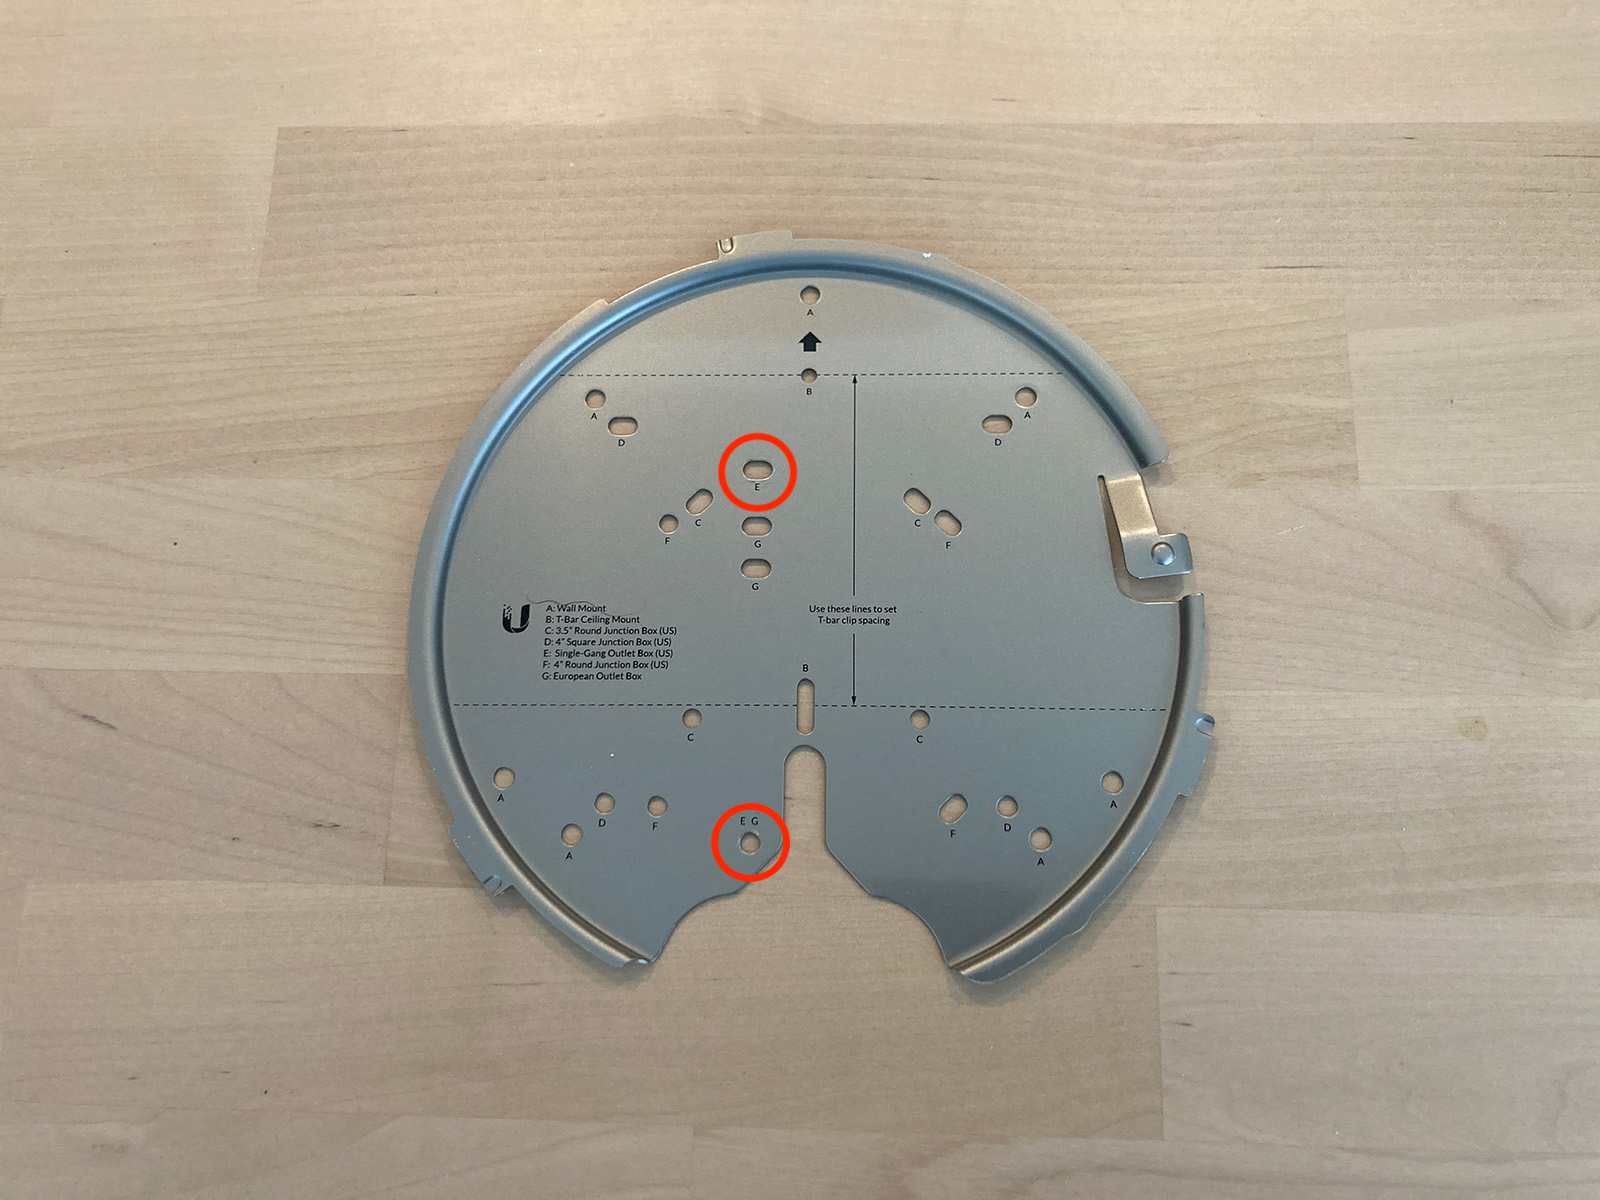
The mounting bracket conveniently allows for a variety of different mounting options. The one for my scenario was the “E” holes for Single-Gang Outlet Box (US). Use screws provided in the AP mounting kit to mount the AP bracket into the low voltage bracket, making sure to pull the cable through first :).
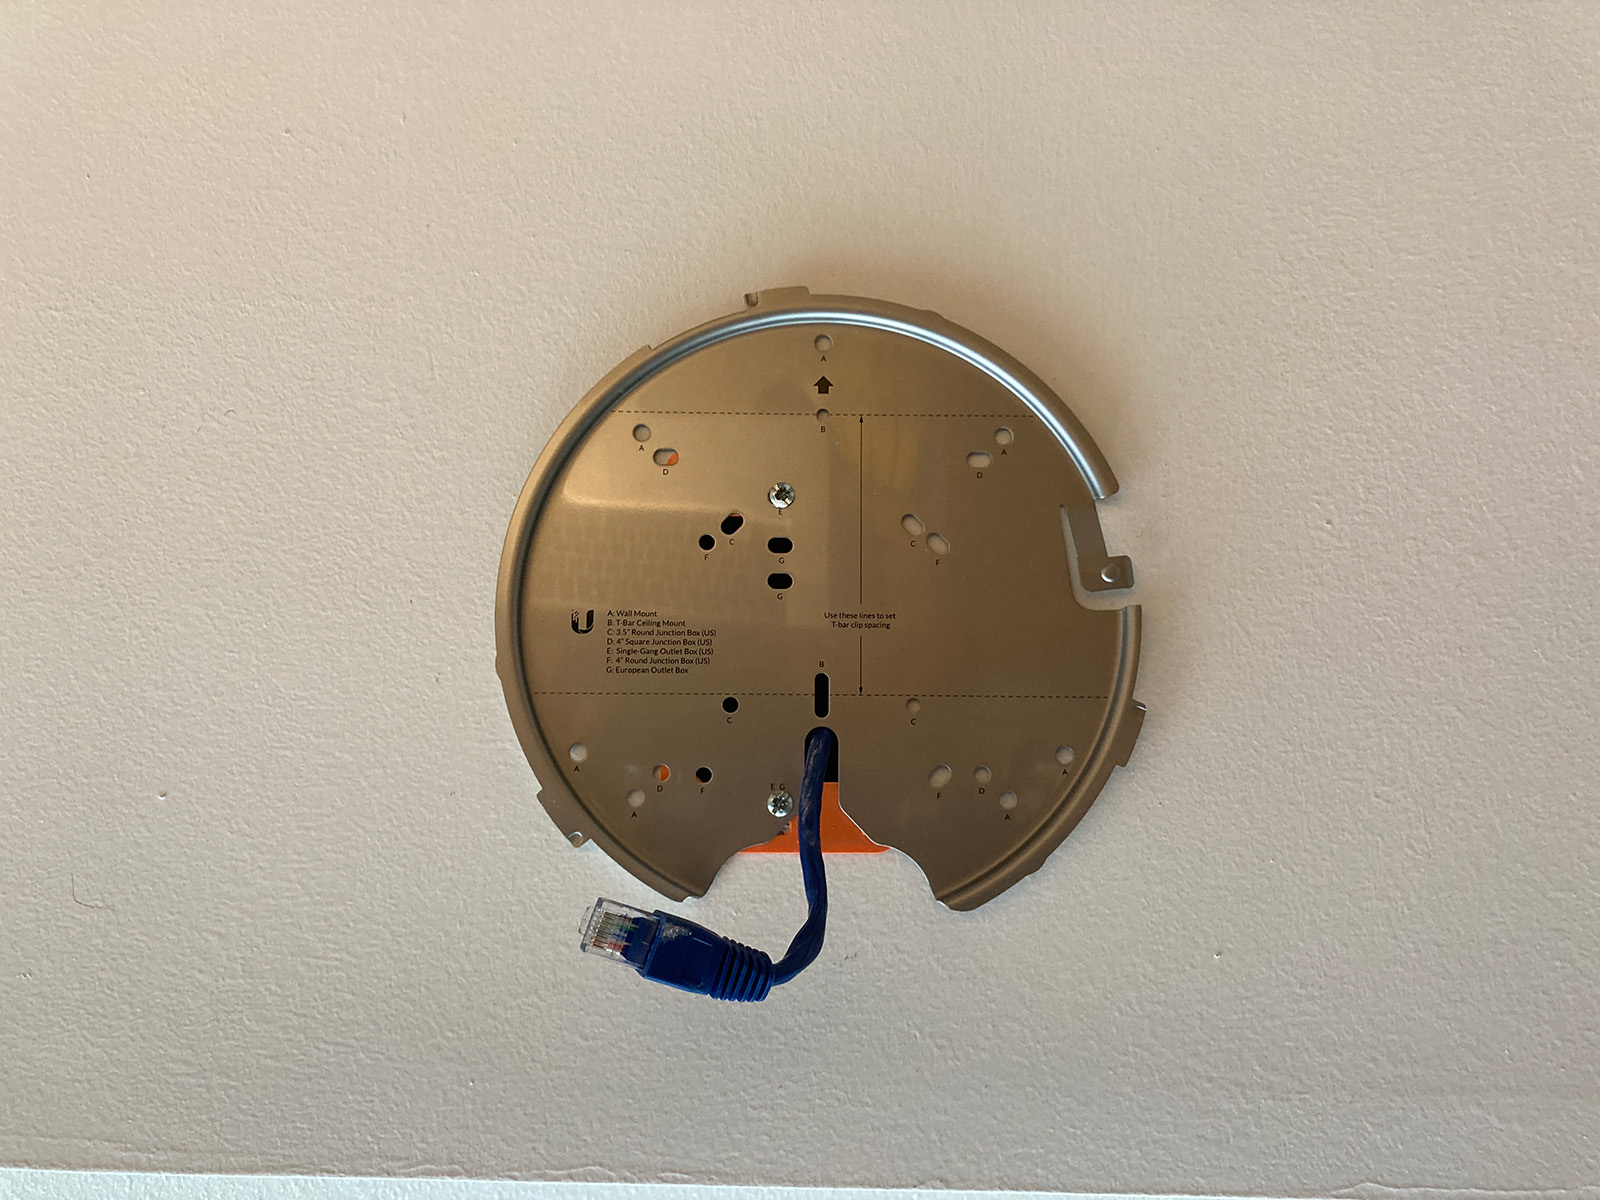
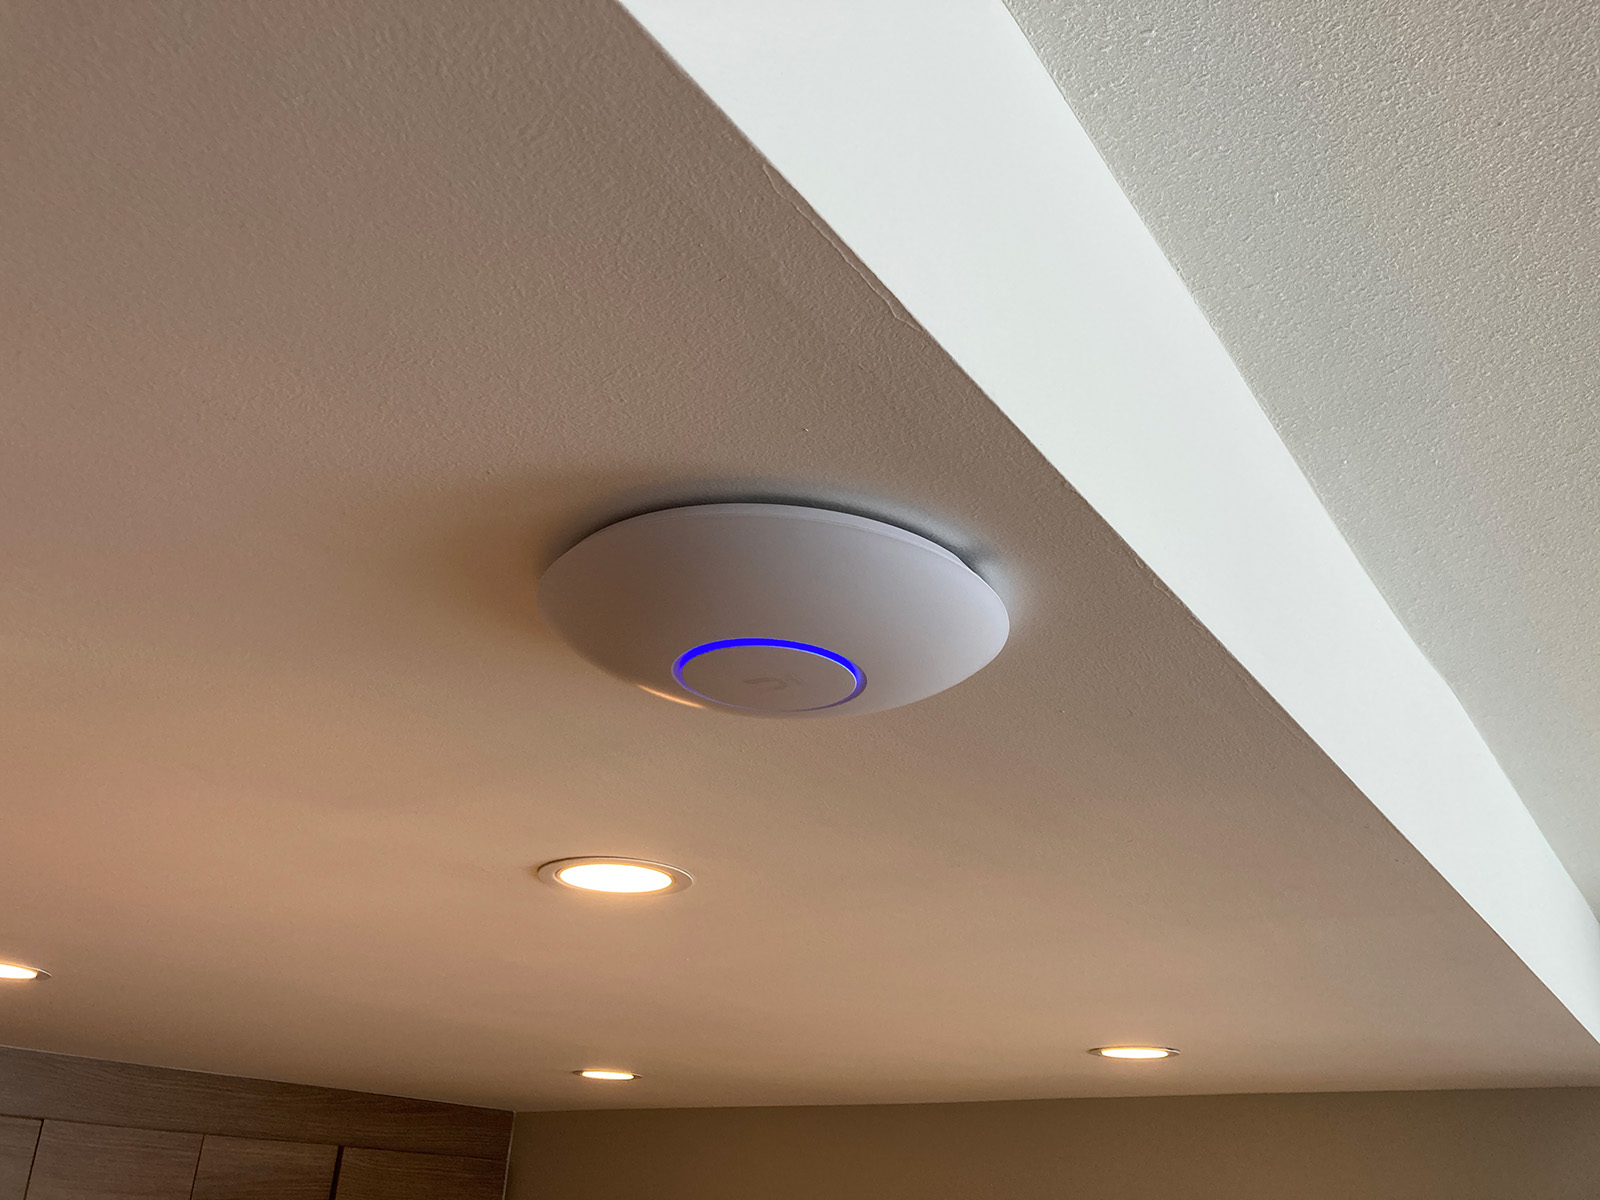
And then all that needs to be done is to latch the AP onto the mounting bracket, and then it’s all done! Looking good on this end with no visible cabling.
Terminating the other end
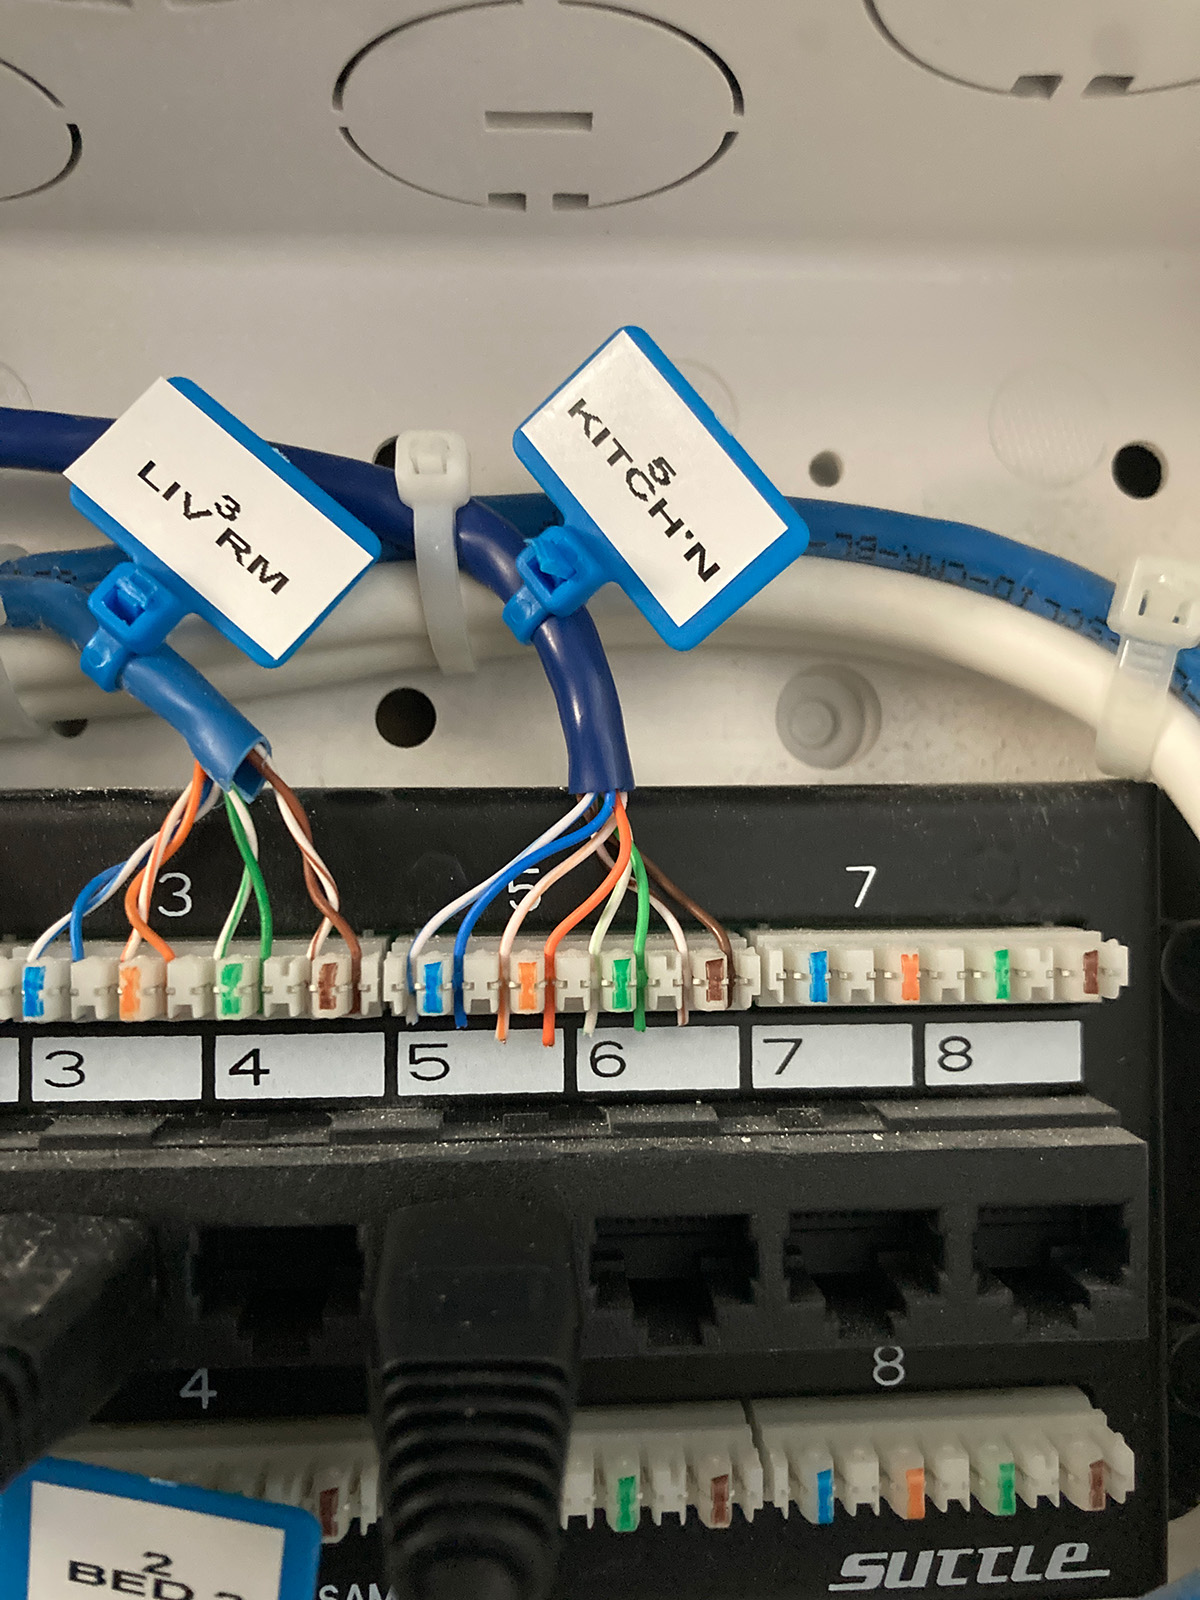
This will depend on your setup where the other end of the Ethernet cable terminates. For me, I pulled the cable into the network enclosure built into the wall of my closet, which has a patch panel.
There are plenty of videos online on how to do this, but basically cut off the connector (if there is one), strip the outer jacket off (carefully, without cutting any of the internal wires), untwist the pairs and line them up in the proper slots (look for instructions on your specific panel on the order the wires should be lined up), and then use a punch down tool to lock the wires in place and make the connection.
Conclusion
I’m very happy how this turned out both in terms of looks and the resulting Wi-Fi coverage. I think I was very lucky with the location and the existing openings inside the bulkhead that I could pull the cable through without much effort. And the resulting Wi-Fi reliability is well worth it. The new central location of the AP is much better at covering my entire apartment and balcony evenly. It’s also very clean to dissemble when it comes time to move out, as a regular cover plate can be put on top of the low voltage bracket; no need to patch any holes.
This was my first time pulling cable behind drywall, so if you know of any better tips and tricks, please leave them in the comments below! Thanks!
Some of the links above may be Amazon Associate links and I may earn from qualifying purchases.