
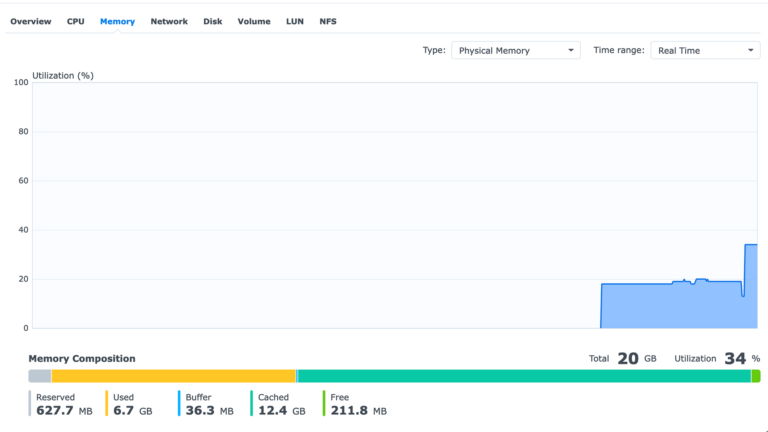
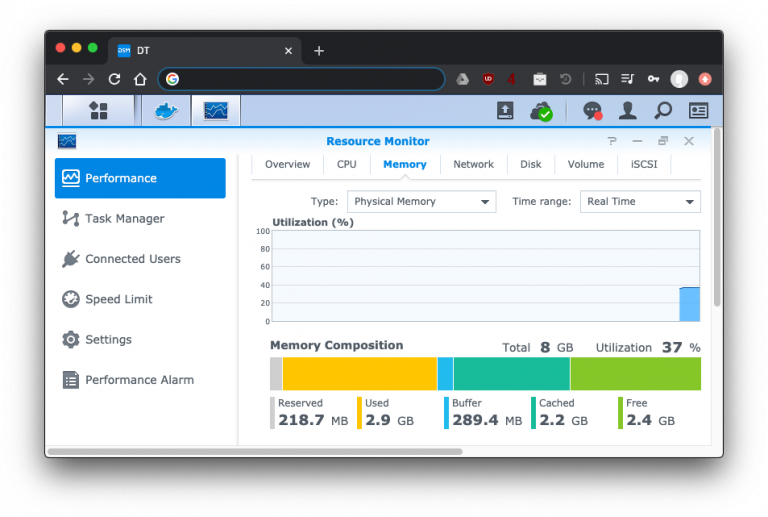
There is a lot of discussion online on unofficial RAM upgrades that work or don’t work on the Synology ds920+. Just for context, the Synology ds920+ comes built in with 4GB RAM soldered in and has one expansion slot. The official maximum is 8GB, and Synology sells an official 4GB RAM stick (model: D4NESO-2666-4G) for this at incredibly steep prices. However, there are many anecdotal reports that adding commodity 8GB and 16GB RAM also work. By running a handful of applications and Docker containers, I was maxing out the built in 4GB of RAM and spilling into swap space which Continue Reading
memory
Upgrading RAM on a Synology ds415+
I’ve had my Synology Diskstation ds415+ network attached storage device since late 2015, replacing my custom FreeNAS box. It came with 2GB of RAM, which is fine for basic file serving, but limited when running multiple applications, including Docker containers. Once applications start swapping onto the hard disks, everything starts grinding to a halt. I finally reached the breaking point on this last night when I had to reboot the NAS once more. I upgrade the RAM in this NAS, and that’s what the rest of this blog post is about.
Suspending Browser Tabs for Memory Conservation
Update: As of February 2021, The Great Suspender is no longer available due to the releases being overtaken by a malacious owner. Modern Chrome versions are said to have better memory management anyway, so you may find a separate extension unnecessary. If you’re like me and have upwards to 30-50 browser tabs open at the same time, you may notice that your computer becomes sluggish. In my case this was because all the tabs still consume memory even though I might not need them for some period of time. I still like to keep some tabs that I might need Continue Reading
VMware ESXi Scratch Space
If you installed VMware ESXi on a USB stick like I did, the “scratch space” (used for storing logs and debug information) is stored on a RAM disk. This takes up 512MB of memory that could otherwise be provisioned to virtual machines. In addition, it does not persist across reboots, which explains why I was never able to find any logs after a crash. Also I was seeing random “No space left on device” errors when I was trying to run the munin monitoring script for ESXi. The solution to this is to simply create a folder on a disk, and Continue Reading