SkyTrain OMC Tour

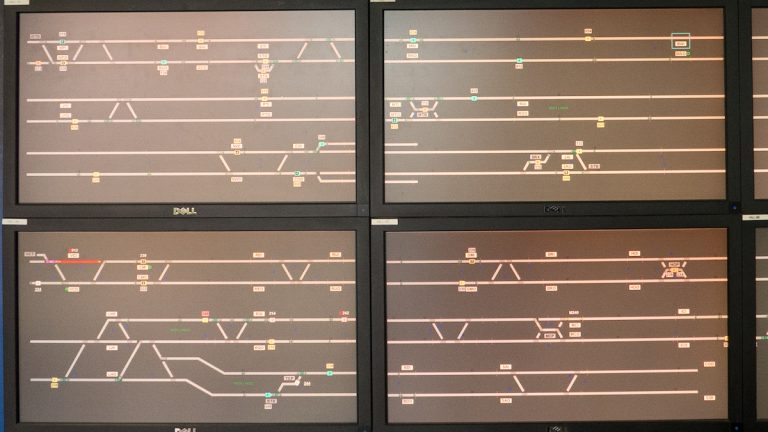
This past Wednesday I had an opportunity to tour the SkyTrain Operations and Maintenance Centre (OMC). I have been there once before back in 2010, and a lot has changed since then.

First place we visited on the tour was the Control Room. The Control Room is in a restricted area on the top floor of the OMC overlooking the yard. At least eight people staff this room 24 hours a day, monitoring, responding to and resolving problems across the system. Unfortunately I wasn’t allowed to take any photos inside the room. But since the last time, most (not all) of the CRT monitors have been replaced with modern flat screens. Despite the modernizations so far, current control room is planned to be replaced in the next several years.

Mimic screens displaying all the trains on the Expo and Millennium lines, outside the main Control Room.

Next, we went through the office areas. One relatively new room is the Visual Management Centre, a room which has flat screens all the way around.

The Visual Management Centre has flat screens all the way around the room.
A smart screen on one side.

Apparently executives and other management come in here to discuss KPIs. Each department can be displayed on its own screen, or for vehicle maintenance purposes, the details of each and every train car can be shown across all the screens.

The smart screens are also in use in other offices I was able to tour, one of which was the engineering duty manager’s (EDM) office adjacent to the main Control Room. Through different application interfaces, the EDM is able to pull up operational status and history of different components of the system such as track switches and facilities such as escalators and elevators.

However, not everything is modern and electronic. We walked through the Library, which contains document archives from maintenance (each train car has its own folder), manuals for training and other literature.

One corner of the Library.

Afterwards, we prepared ourselves to walk through the maintenance area and yard. Safety standards have apparently increased since last time, and I was required to put on steel toe caps, a safety vest and safety glasses.

Steel toe caps that fit over normal shoes.

We walked through the two maintenance shops, where trains get worked on.

Vehicle Maintenance Shop 1
Vehicle Maintenance Shop 2

And the obligatory walk under a train, this time a Mark II. The peachy metallic thing in the middle is the linear induction motor, which reacts with the flat middle rail to propel the train forward.

Looking underneath a Mark II train.

Then we explored some other parts of the yard on foot. We visited the only level crossing on the entire SkyTrain system.

The only level crossing in the entire SkyTrain system.

I’m grateful for the HR team at A Thinking Ape where I work for putting this together for me (this experience was a reward for winning what we call a “Golden Banana” award, which is our quarterly employee recognition program). It was nice to see the modernization of the Control Room and be able to explore some different parts of the yard I had not had an opportunity to see last time.

Driving around with car2go

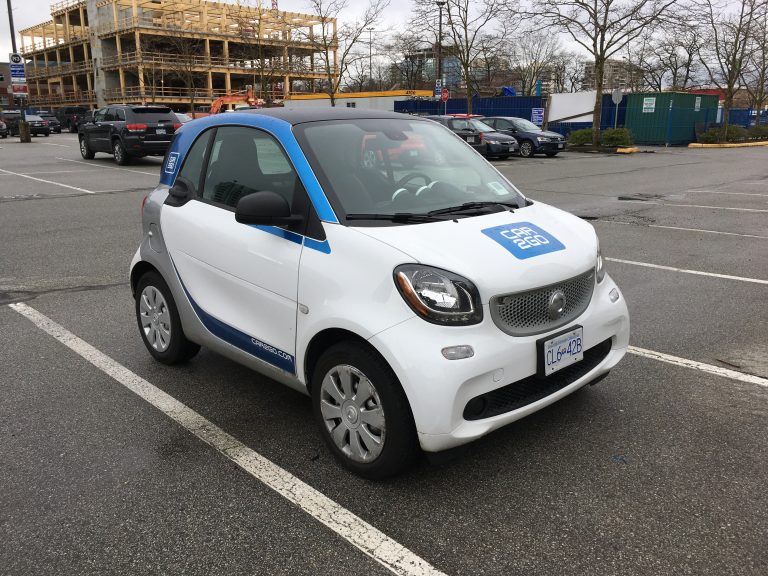
About a month ago, I signed up for a car2go account.  So far I’ve used it twice already and I’ve been pretty happy with the experience.

Why car2go?

  1. In the case I miss the last SkyTrain home, the car2go would be a cheaper option than taking a taxi, and more time-efficient than waiting for the Night Bus.  (It’s roughly $10 for a 20-minute car2go trip from downtown to Richmond, versus a $35 taxi ride.  The earliest Night Bus gets me home around 3am).
  2. I share cars with my parents, so in the rare case that they need the cars, I wanted to have a backup just in case.  Since there’s no significant monthly fee, it would not hurt to keep the account just for the times that I need to use it. (There is a $2 annual fee though, but that’s pretty reasonable).
  3. It’s the only car-sharing service to service Richmond (albeit only at Kwantlen University, but I live close by).
  4. car2go does not require you to return the car to its original location—it’s a one-way service, which is perfect for my night-time trips.

Coming from driving 20+ year old minivans, the Smart car was comparatively very zippy, and reminded me of driving a go-kart.  The accelerating and braking were quite sensitive, but that was not too difficult to get used to.

In case you’re interested in joining, if you get a referral code from someone you know, you can signup for free.  (Send me a direct message on Twitter @DennisTT if you don’t know anyone with car2go).

Post-summer update

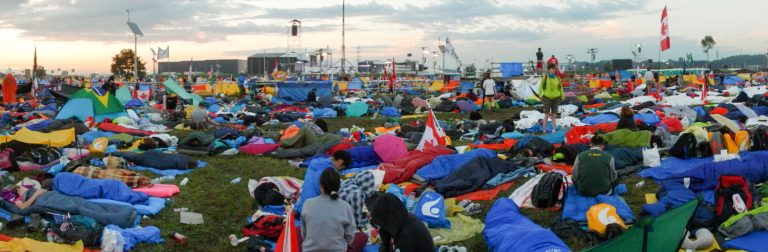
I can’t believe it’s September already.  The weather is starting to become cool and wet, days are becoming shorter, marking the end of what has been an incredible summer (and year to date).  It’s been a while since I’ve written here, so with the changing season I thought I’d share a bit of an update of 2016 so far.

Some of these warrant their own blog posts, but until I have time to write the full thing here is a summary. Continue Reading

Fun ways to get from Richmond to Downtown Vancouver on transit

I commute from Richmond to Downtown Vancouver every day for work.  Normally I take the Canada Line, which is a quick and reliable way to and from work.  As much as I like trains, some days it just seems boring; after all, the majority of the ride is underground.

So I tasked myself to find five different ways to get to work (potentially one for each day of the week), if I wanted to take a break from the Canada Line.  Let’s assume we’re commuting from Richmond Centre to Waterfront.  Obviously we’re not optimizing for travel time.

Option 1: 403, 480, 44

A nice ride to UBC then along 4th Avenue, Burrard Street Bridge downtown.  If you’re lucky, you can complete this entire route on articulated buses.

Option 2: 407, 22

I’d probably consider this one the most unscenic one, but it only involves one transfer and is a bus-only route.  Probably a good one for napping.

Option 3: 430, Expo/Millennium Line

An express bus to Metrotown, then a ride on the SkyTrain downtown.  If you’re extremely lucky, you may find a seat at the front of the SkyTrain.

Option 4: 410, Expo/Millennium Line

Kind of the same as the previous option except this one includes a highway run along Highway 91, but no express through the city.  This has a longer SkyTrain ride too, which also includes passing the SkyTrain yard.

Option 5: 407, 480, 17, 50

And finally the crazy bus-only route.  Almost guaranteed to ride four different types of buses – a New Flyer 40 footer on the 407, an articulated bus on the 480, a trolley bus on the 17 and most likely a Novabus on the 50.

Of course these options aren’t exhaustive; there are many other combinations that can loop through all parts of town.  But these are the ones off the top of my head that balance being interesting and getting to work in a reasonable amount of time.

Comments on the new signage at SkyTrain stations

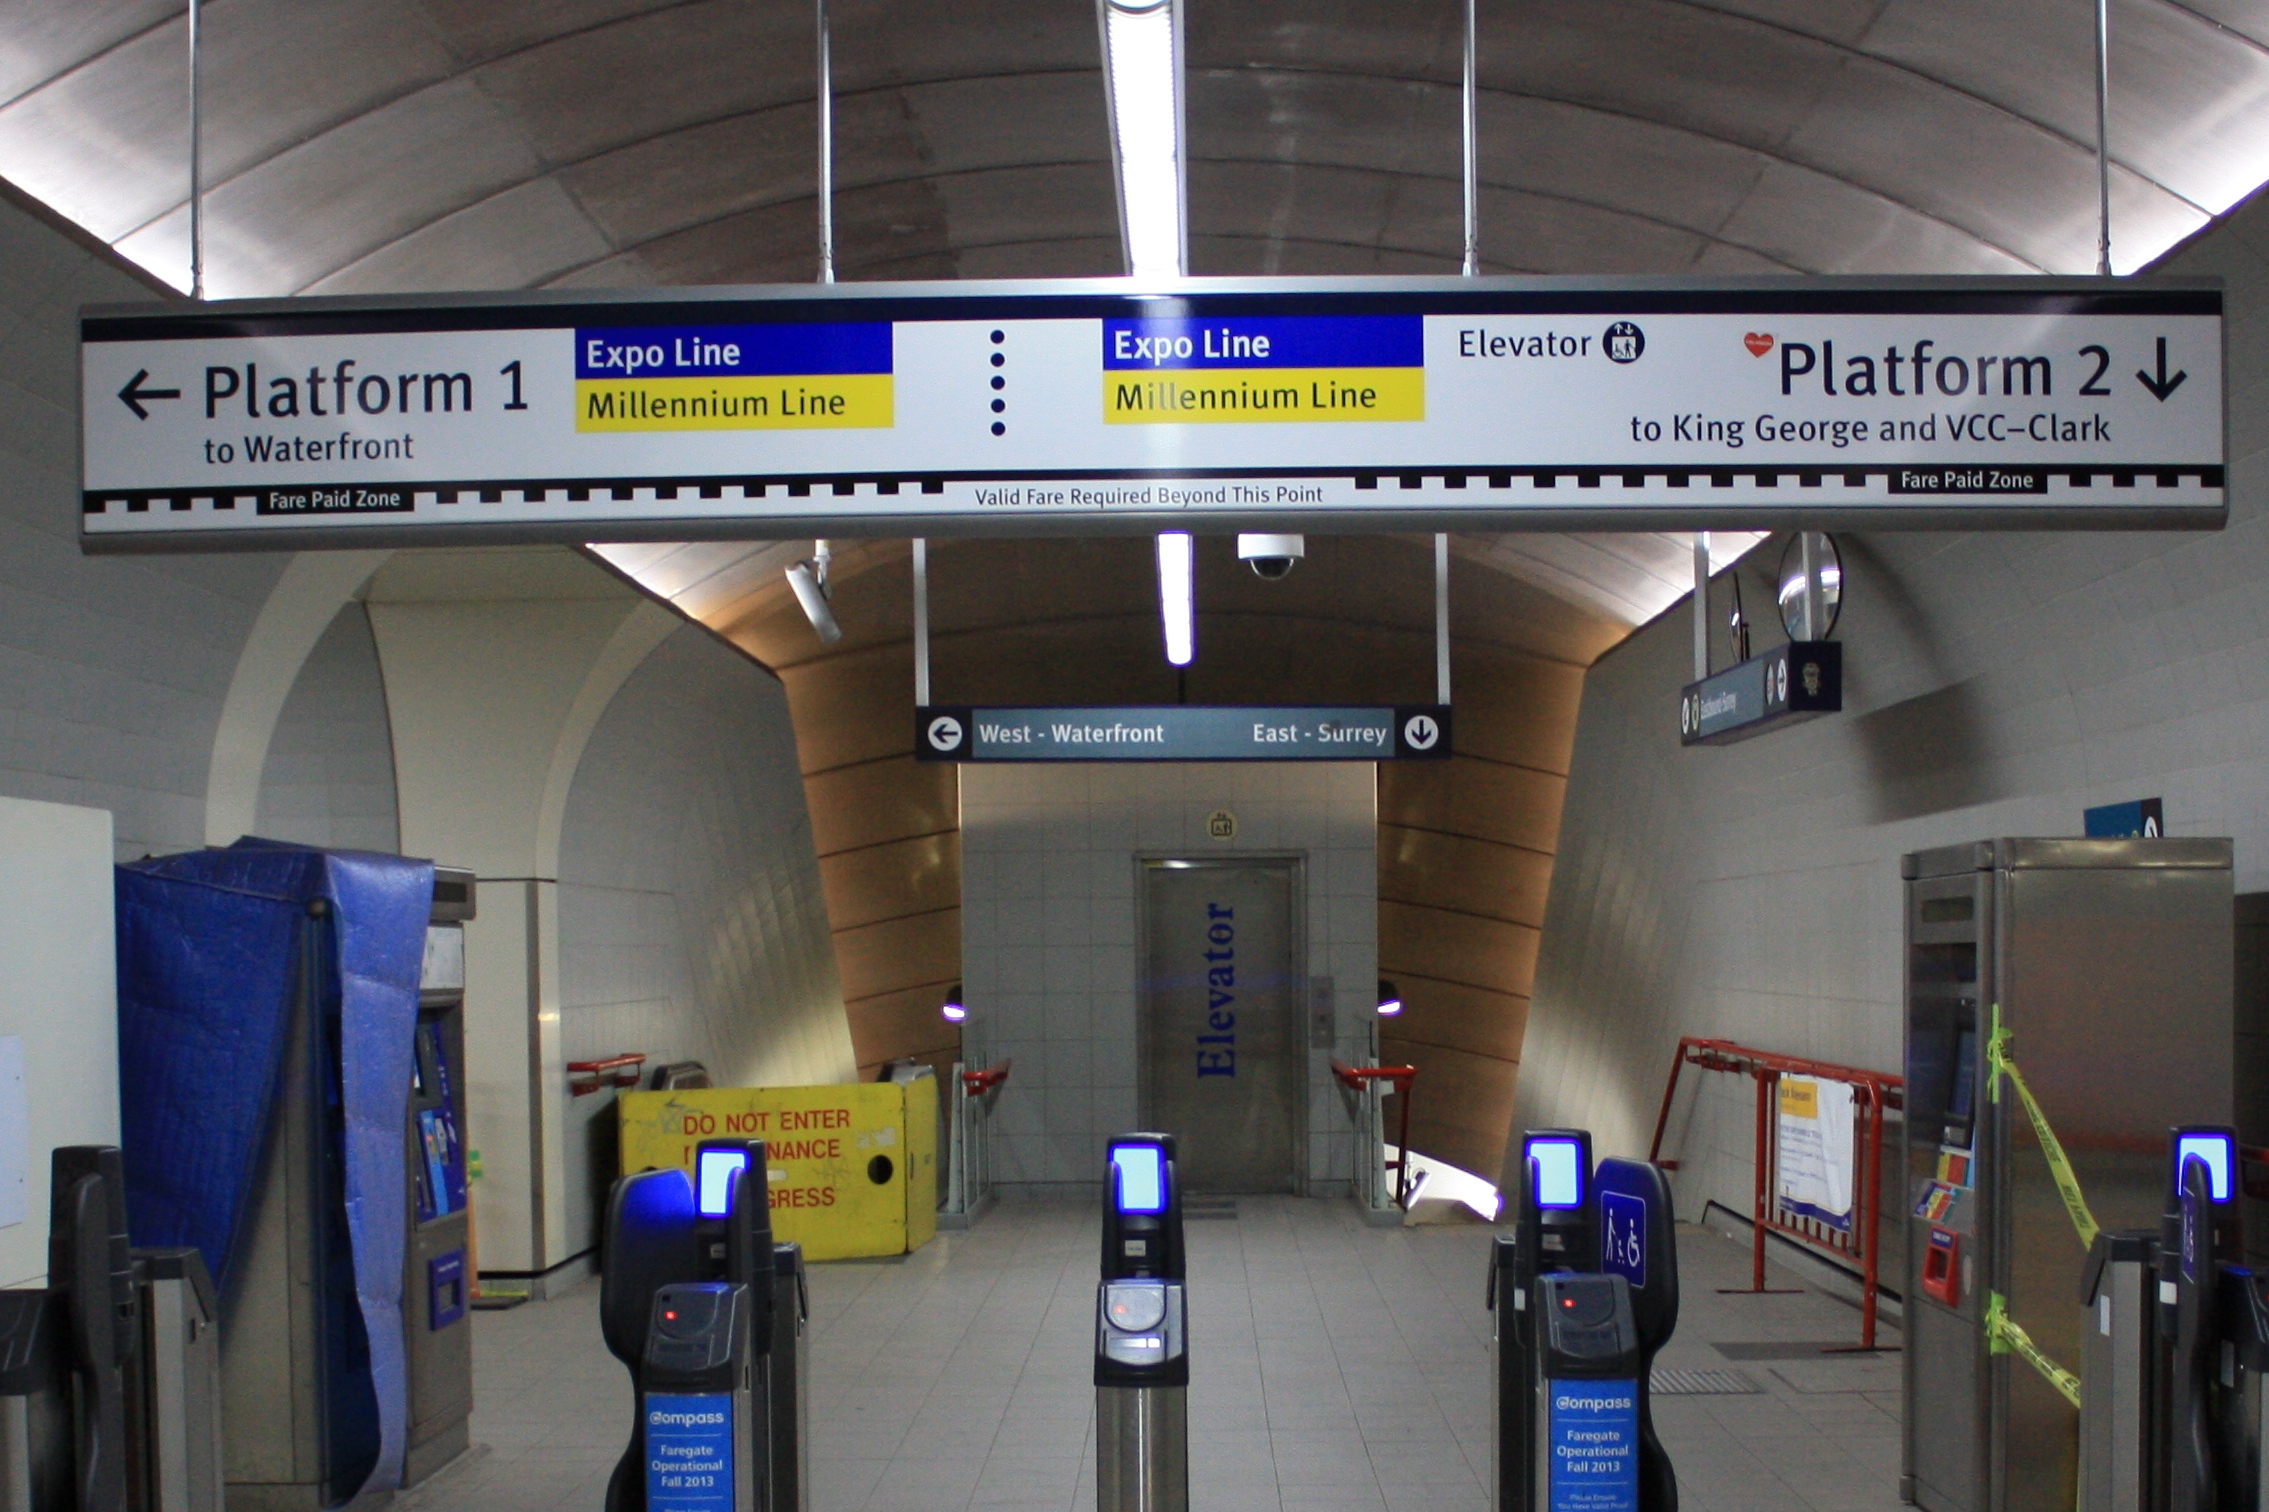
I was going through some of my photos and came across a set where I was comparing old and new signage on the SkyTrain.  Below is one example from Granville Station.  You can see the new sign in the foreground, with the existing sign further back.  What struck me is how complex the information is on the new sign.

Platform Signage at Granville SkyTrain Station
Directional signage at Granville SkyTrain Station

The primary emphasis (judging from the size of the text) of the new platform signs is placed on the platform numbers, as opposed to the direction of travel as is in the old sign.  In fact, the direction of travel isn’t even on the new sign at all.

I remembered reading the following guideline some months ago from an old New York City Transit Authority Graphics Standards Manual circa 1970.

The subway rider should be given only information at the point of decision.  Never before.  Never after.

The decision to be made at the faregates is whether I want to cross the faregates or not.  The information about the direction of the platforms is presented too early to the rider.  The information that I’d expect to see above the faregates to help me with that decision would be something along the lines of “To Trains – Expo & Millennium Lines – Westbound to Downtown; Eastbound to Burnaby, New Westminster, Surrey“.  This indicates that there are trains are behind the gates, which lines they run on, and where I could possibly go from here.  The information about the specific platforms doesn’t need to be shown at the point of the faregates.

After that, at the intersection where the old sign is, the rider can be shown information on the different platforms and destinations.  However, it would make more sense to me to emphasize the direction of travel, and the destination instead of the platform number, especially since most stations only have two platforms.  Platform numbers are only be useful for people following a trip plan, or if there are two or more lines at a station; they aren’t really useful in any other circumstance.

The effect of giving people information too early can also be seen on the signage at Burrard Station, depicted below.

New signage and fare gates at Burrard SkyTrain Station
New directional signage and fare gates at Burrard SkyTrain Station.  Notice the arrows pointing in a variety of directions.

There should actually be two decision points: one at the faregates whether to enter or not, and the second one at the intersection of the corridors to decide which train to take.  Since platform directions are given at the decision point of the faregates, the arrows pointing to the platforms go in all different directions.  The existing signs above the corridors to each of the platforms is the correct decision point (whether to enter into the corridor or not) to give platform information.

The guideline in the old NYCTA Graphic Standards manual makes a lot of sense to me now.  Putting relevant information only at the decision point makes signs less cluttered with information.