
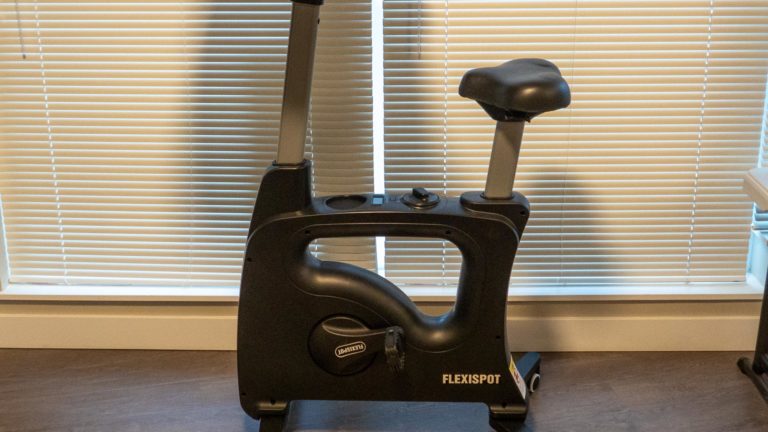
I have been working primarily from home since the COVID-19 pandemic hit in March 2020, and with our company moving to remote-first work permanently since last year, I’ve been looking for ways to improve my quality of life in my work-from-home environment. Check out the #wfh tag for posts about my other work-from-home equipment. One of the issues with working from home is less opportunities for physical activity: I used to easily complete my 10k steps a day when I needed to work at the office. However, with my office only 15 steps away, this is much harder to complete Continue Reading
Life
The Mountain Ropes Adventure on Grouse Mountain
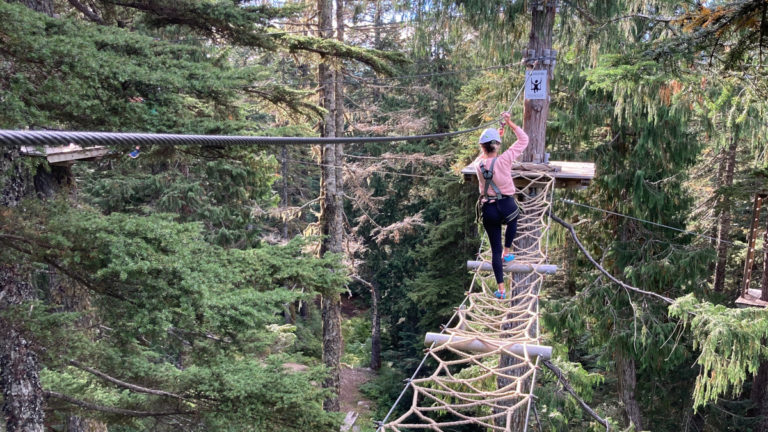
Yesterday on my day off work, taking advantage of the sunny weather I made a day-of booking for the Mountain Ropes Adventure up on Grouse Mountain. My annual pass included one tour for free, so I wanted to take advantage of it before they close down the summer season. I was impressed with the entire ropes course. I was expecting that, thinking it was catering to kids and tourists, the course would be super easy, but it turned out to be enough of a challenge (at least for someone like me who’s not athletic or super fit), especially the advanced Continue Reading
COVID-19 vaccine – 1st dose
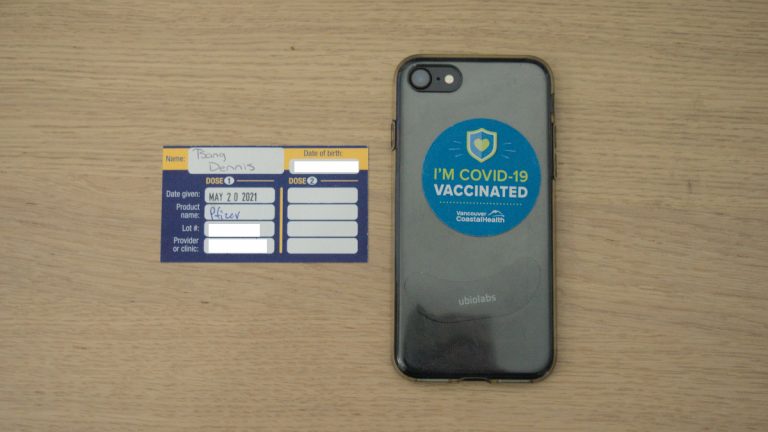
The day finally came! Last Thursday, I received the first dose of the Pfizer-BioNTech COVID-19 vaccine. In BC we have about 58% of adults with at least one dose of a COVID-19 vaccine. Looking forward to that increasing community immunity so that our lives can return to the previous “normal”.
COVID-19: Thoughts from working from home for 6 weeks
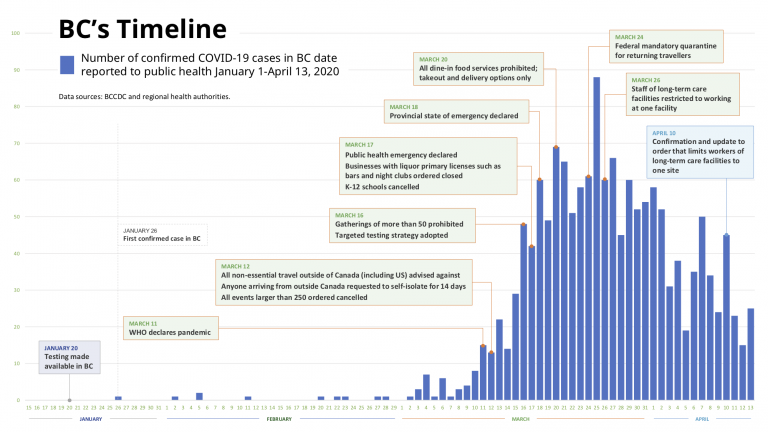
The COVID-19 pandemic has shifted the way many around the world live their lives over the recent months. For us in the Vancouver/British Columbia area, it has been about a month and half since we have had significant measures in place to reduce the spread of the virus.
In this post I will go over the changes that have affected me, and things that I have found worked well.
First 3D Print – Projector screen replacement part
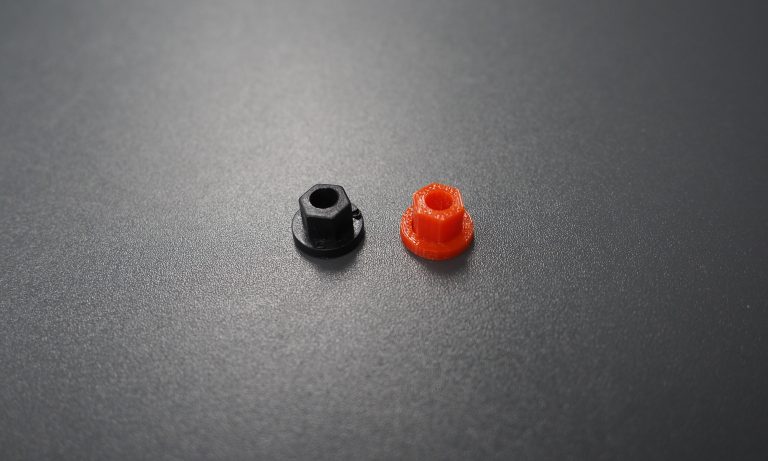
3D printing has gaining popularity in the recent years, and since a few years ago, Richmond Public Library has had ‘MakerBot Replicator 2’ stations available for patrons to use to create their own objects. This week, I had the opportunity to use the 3D printers for the first time to print a replacement part for a projector screen. Backstory Some time in March, one of these plastic caps popped off the projector screen we use for youth ministry at St. Francis Xavier Parish, and disappeared. It turns out that this small part (about 1cm in diameter), is a critical component Continue Reading