Replacing a failed disk in RAID on an OVHcloud dedicated server

Yesterday morning, I woke up to some Discord messages saying that one of my websites was offline. Not a great way to start off the morning! I tried to first ascertain the scope of the issue—turns out none of my services were accessible at all from that one dedicated server. Panic started to set in a bit… did I forget to pay my monthly server bill? Did the server get hacked? Or did the server burn down?

Continue Reading

DIY: How to mount a UniFi access point to the ceiling

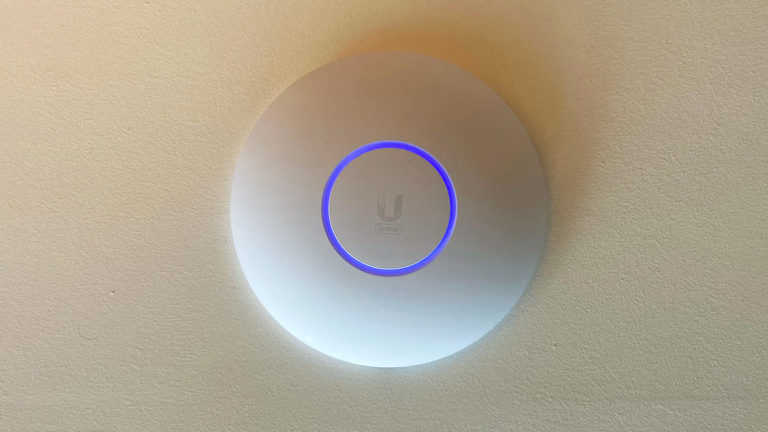
Last year when I moved into my new apartment, I upgraded to a Ubiquiti UniFi Dream Machine (UDM) router to support the gigabit Internet speed I could now subscribe to. Due to the location of the fiber optical network terminal (ONT) in my home, the UDM had to be located in the closet of my secondary bedroom, which is on one side of the apartment. Now while the UDM has a powerful enough Wi-Fi signal that can cover my apartment reasonably, the 5GHz band, is significantly weaker two walls over in my main bedroom. In addition, over the summer I realized that the Wi-Fi was also pretty spotty on my balcony due to also having to cross two walls plus glass.

So I decided to go on a quest to improve the Wi-Fi signal. The main lineup of UniFi’s access points (AP) consist of the circular-shaped ceiling-mounted access points. I decided to go for the Unifi6 Pro. Probably very overkill.

Although they can be mounted to the wall, the radiation pattern means that the area behind the wall is a dead zone. This would not work for me because I didn’t have a free wall that would face my entire apartment. Soon, I found the best place to ceiling mount an AP would be to mount it on the kitchen bulkhead. The rest of my ceiling is concrete so it would not have been easy to mount and run the Ethernet cable cleanly. With the bulkhead I could mount the AP to it and run the cable through it to the closet, which is conveniently adjacent to the kitchen. My kitchen is also pretty central to the apartment, so an AP located there would be able to cover most of the apartment by line of sight, or through one wall at most.

Just to make sure it was feasible, I popped out some of the recessed ceiling lights in order to take a look at what was inside the bulkhead. This was to check that the space I wanted to mount it was clear, and that the bulkhead did indeed run into the closet without any additional barriers.

Tools and items used:

  • Stud sensor – To find a good space to cut
  • Jab/drywall saw – To make the hole for the mounting bracket
  • Fish tape and/or Fibreglass rods – This will depend on your run. I ended up using both, using the fish tape to run the line, while using the rods to “push” or “help” the fish tape over/under some obstacles.
  • Low voltage bracket – single gang size. The UniFi AP’s mounting brackets will fit a single gang bracket with no additional holes needed. Also when you move out it will be simple to cover this with a blank plate or one with a keystone jack. You might need another one depending on where the other end of your Ethernet cable ends up.
  • Ethernet cable – your preference, depending on length and speed and how future-proof you want the cable to be. I just used typical Cat5e.
  • String – for helping pull cables
  • Punch down tool – Because my cable will be run to a network patch panel, this will be used to terminate the cable to the panel. But if you aren’t terminating at a patch panel, then ignore this.
Continue Reading

RAM Upgrade on a Synology ds920+

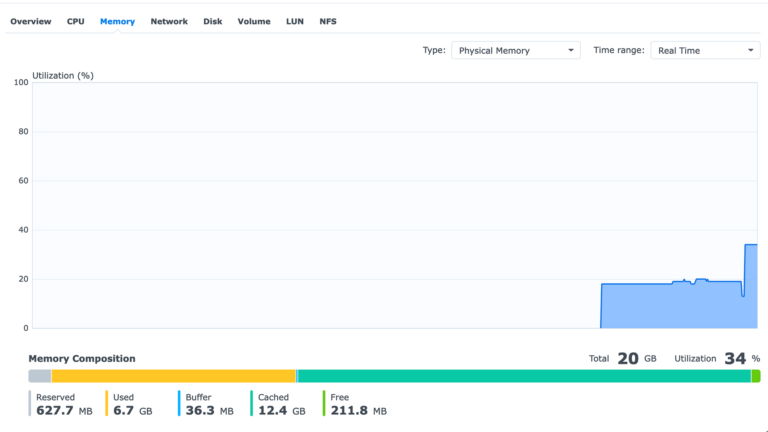
There are a lot of threads on unofficial RAM upgrades that work or don’t work on the Synology ds920+.

Just for context, the Synology ds920+ comes built in with 4GB RAM soldered in and has one expansion slot. The official maximum is 8GB, and Synology sells an official 4GB RAM stick (model: D4NESO-2666-4G) for this. However, there are many anecdotal reports that adding 8GB and 16GB RAM also work.

By running a handful of applications and Docker containers, I was maxing out the built in 4GB of RAM and spilling into swap space which slowed down the entire NAS to almost a standstill.

However, the NAS seems to be pretty finicky in what RAM it accepts or not. My first attempt was with a Kingston Fury Impact 8GB, but I could not get it stable. The system would lock up after a few minutes, if it booted up at all. I suspected that it was incompatible, although it is possible it was just the stick was bad.

Not wanting to spend more time, I went for Crucial CT16G4SFD8266 16GB upgrade. Crucial. This was recommended on other sites as well. Lo and behold, it worked the first time I put it in, and also the Synology DSM did not have any notifications that the RAM was unsupported.

So if you’re looking for an upgrade for your ds920+, go for the recommended Crucial ones, even if it’s slightly more expensive. It will save you time and headache.

Some of the links above may be Amazon Associate links and I may earn from qualifying purchases.

Setting up IPv6 with Telus PureFibre on a Ubiquiti UniFi Dream Machine

I recently got a Ubiquiti UniFi Dream Machine (UDM) to support gigabit-speed internet at my new apartment. The UniFi line is a significant step up from consumer home routers, providing better customizability and management options for networks.

The following settings are required to get IPv6 working locally using Telus PureFibre internet:

In the Network application, go to Settings -> Internet -> WAN. Expand the Advanced section, then expand the IPv6 Connection subsection. Set the following settings:

  • IPv6 Connection: DHCPv6
  • Prefix Delegation Size: 56

Apply the changes at the bottom.

Then go to the Networks section and open your LAN network. Expand the Advanced section and scroll down to the IPv6 options, and set the following values:

  • IPv6 Interface Type: Prefix Delegation
  • IPv6 RA: Enabled
  • The rest can be the default values.

Apply the changes.

The next time you reconnect to the network, you should see your computer be given an IPv6 address. You can use sites like ipv6-test.com to test your IPv6 connectivity.

Handling power outages with an uninterruptible power supply and NUT

The main reason for having a UPS is to protect against data loss due to power outages whether it be unsaved work, or corruption due to the computer not having enough time to write things to disk. I only really started to take this seriously when I got my Synology networked attached storage (NAS) which holds all my data.

The UPS I chose is an APC model with 1300VA and a USB connection, which is powerful enough to power most of the critical equipment I have at home and to ensure they have enough time to shut down. One of the advantages of having an uninterruptible power supply (UPS) with a USB connection is that it is possible to smartly shut down any computers during a power outage.

My strategy is when the UPS goes on battery, I want the Windows PC and Linux server to shut down immediately (well after a 1 minute timeout). These are the heaviest load (roughly 100W each on idle) on the UPS and they aren’t running anything really important that I need during a power outage; they just need to shutdown cleanly. The Synology NAS is a lighter load so I don’t mind keeping that one on and only shut it down when the UPS battery is low. Keeping the cable modem and wireless router allows me to continue to have network access which is critical for NUT to work, but also for general productivity in case of a prolonged failure). I’ve found in past outages that the cable equipment in my apartment building has some sort of separate or backup power source as well so generally the internet can continue to work. With just the cable modem, router and Synology the power draw is about 50W. I can manually shut down the NAS if I want to prolong the network even further.

What’s this NUT you keep talking about?

NUT stands for Network UPS Tools which are a set of utilities that are cross platform and cross manufacturer that monitors and responds to changes in UPS statuses. As we will see in the following sections, Synology NAS already has built in support for NUT, and NUT tools can be installed on Windows and Linux.

Continue Reading
Exit mobile version