

Prayer for Guidance and for Deliverance. A Psalm of David.
“To thee, O Lord, I lift up my soul. …”
DIY: How to mount a UniFi access point to the ceiling
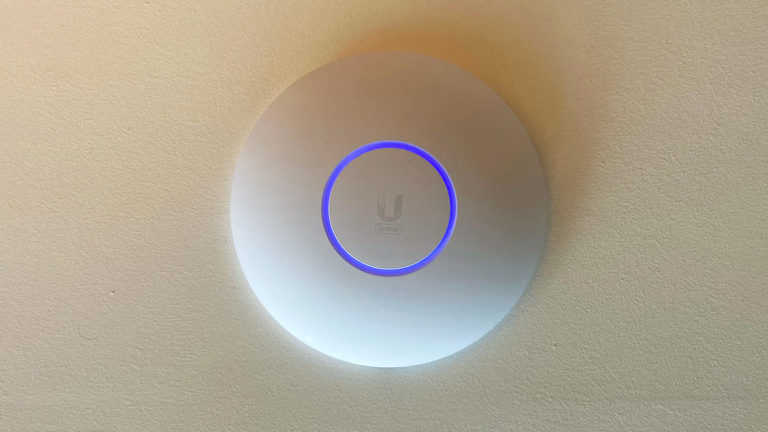
Last year when I moved into my new apartment, I upgraded to a Ubiquiti UniFi Dream Machine (UDM) router to support the gigabit Internet speed I could now subscribe to. Due to the location of the fiber optical network terminal (ONT) in my home, the UDM had to be located in the closet of my secondary bedroom, which is on one side of the apartment. Now while the UDM has a powerful enough Wi-Fi signal that can cover my apartment reasonably, the 5GHz band, is significantly weaker two walls over in my main bedroom. In addition, over the summer I Continue Reading
WFH Desk Bike – Flexispot v9
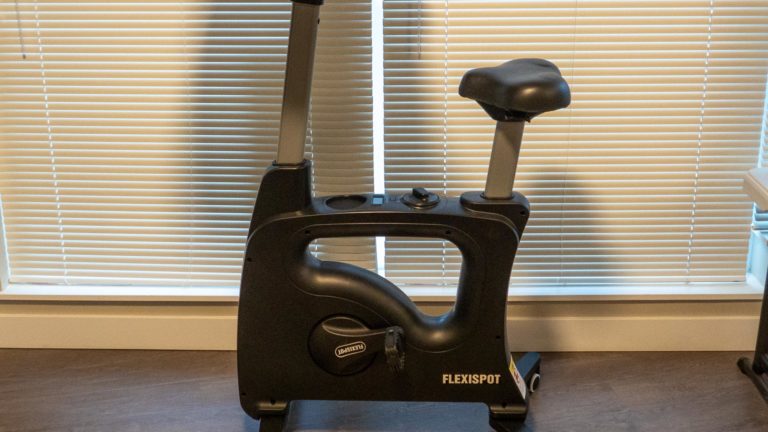
I have been working primarily from home since the COVID-19 pandemic hit in March 2020, and with our company moving to remote-first work permanently since last year, I’ve been looking for ways to improve my quality of life in my work-from-home environment. Check out the #wfh tag for posts about my other work-from-home equipment. One of the issues with working from home is less opportunities for physical activity: I used to easily complete my 10k steps a day when I needed to work at the office. However, with my office only 15 steps away, this is much harder to complete Continue Reading
Thoughts on the Holy Spirit

Today is Pentecost, the 50th day after Easter, when the Catholic Church celebrates the coming down of the Holy Spirit onto the Apostles, and consequently the birth of the Church. Yesterday, I was at a local Catholic young adults event where Eric Chow was speaking on the Holy Spirit. I took away the following thoughts:
RAM Upgrade on a Synology ds920+
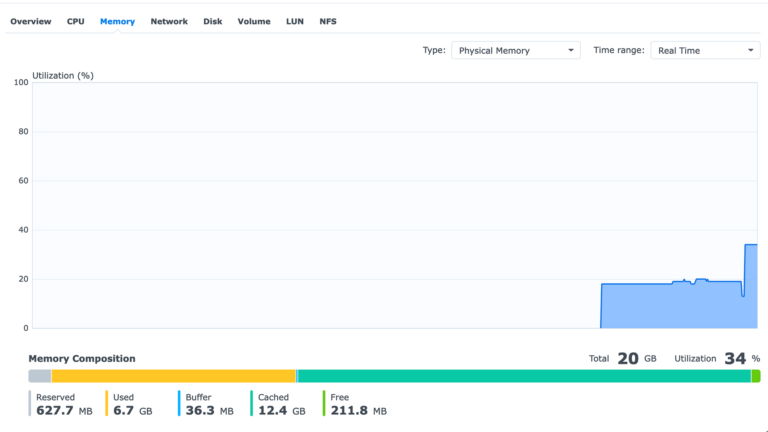
There is a lot of discussion online on unofficial RAM upgrades that work or don’t work on the Synology ds920+. Just for context, the Synology ds920+ comes built in with 4GB RAM soldered in and has one expansion slot. The official maximum is 8GB, and Synology sells an official 4GB RAM stick (model: D4NESO-2666-4G) for this at incredibly steep prices. However, there are many anecdotal reports that adding commodity 8GB and 16GB RAM also work. By running a handful of applications and Docker containers, I was maxing out the built in 4GB of RAM and spilling into swap space which Continue Reading